
When you have a Tablet PC such as the Surface Pro 3, it is really easy to get stuck using OneNote for everything. After all, the two are a perfect match. But – there are plenty of other applications out there that can very effectively leverage the stylus. In this three part series, I’m going to look at Word, PowerPoint and Excel, giving real life examples of how I have used the stylus in the software for my classes, and then a quick how to guide if you want to get out and give it a go.
Microsoft Word is a powerhouse for word processing – that’s why it was invented! Most of us use it, but because of the way we have always used it, most people are stuck with the linearity of keyboard entry with a bit of mouse action for formatting. That’s not a bad thing – it’s fit for purpose and appropriate.
But what if you pick up your stylus?
 As soon as you do, there are three main things that you can easily do:
- You can highlight on the page, in multiple colours
- you can annotate all over the page, in multiple colours
- You can insert ink comments
These all replicate what we do when reviewing documents in the paper form, so it’s great to be able to replicate these behaviours exactly where we first create the document – and because they are all digital, if you make a mistake it’s easily erased or changed. In the past I know I have handed back review docs or assignments with large amounts of liquid paper used… no more!
Here’s how to Annotate
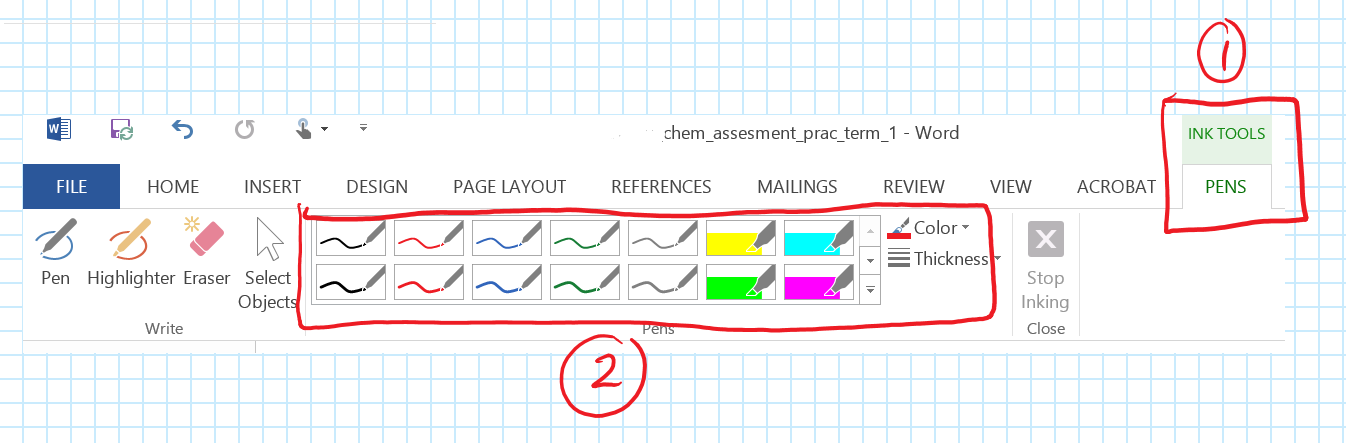
- As soon as you bring your stylus near the screen in word, a new toolbar pops into existence, the INK TOOLS.
- From the menu that appears, choose the pen or highlighter you want, and away you go!
Here’s how to insert an ink comment
Often times there isn’t enough space to write what you need, or you need to express an idea or comment that doesn’t directly relate to corrections. In comments are perfect for this. Place your cursor at the point in the document you want to add the comment, or highlight the text you want to comment on and
- From the REVIEW toolbar
- Select “Ink Comment”
- The page gets a new margin down the right hand side with your ink comment – write in here to you hearts content. The box expands as you need more space.

So there you have it – annotation in word is easy. Next time we’ll jump to Excel and look at annotations uses within a spreadsheet package.

[…] Microsoft Word is a powerhouse for word processing – that’s why it was invented! Most of us use it, but because of the way we have always used it, most people are stuck with the linearity of keyboard entry with a bit of mouse action for formatting. That’s not a bad thing – it’s fit for purpose and appropriate. Check out how you can use Word with a Stylus at this post. […]
LikeLike
Matthew, what about making corrections? Is it possible to cross out a piece of text and write in the correction with the stylus? And then have the correction be turned into text by INK?
LikeLike
Hi Robert. No ink to text within word’s inking itself, but you can definitely do what you want by turning the onscreen “touch keyboard” into ink recognition mode – works really well.
LikeLike
Thanks, Matthew. I have another thought, since I’m not good with on-screen keyboards. Do the comments one writes in the margins get converted to text? And if so, could they later be copied and inserted into the body of the document?
LikeLike