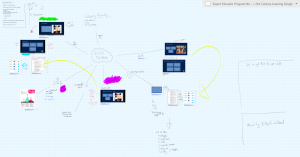
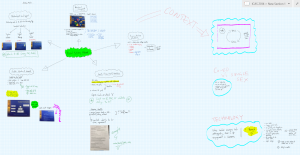
As a learner I was always bad at taking notes and even worse at making them. I went through school and university pre mobile computing and was limited to A4 pages – At university, if we were lucky, the lecturer might let us copy his or her overhead transparencies and I remember in my final year a lecturer used PowerPoint and gave us slide print outs – it was amazing at the time! I also remember being introduced to the Cornell note taking methodology and realising that having a system for taking, making and reviewing notes would really make a difference. If you haven’t been exposed to this method before, you simply rule a margin down the left hand side of the page which creates a large “content” area on the right, a smaller “cue column” on the left, and then you rule a final margin across the bottom of the page creating a “summary” area. During the leaning experience (or even a meeting!) you take notes however you would like in the content area. Any time you think of a question, or get a key point or idea, you write that down in the cue column. It’s important that you find answers one way or another to the questions, because this is your brain trying to associate information for meaning. Finally at the end of day, you write a summary down the bottom, and it is this you go to first when re-reading and revising your notes, going back to the cue and content areas only if you need more detailed information. This is only a really brief overview – you can more detail at http://lsc.cornell.edu/Sidebars/Study_Skills_Resources/cornellsystem.pdf and even download a OneNote template from http://office.microsoft.com/en-au/templates/cornell-note-taking-method-TC010080377.aspx If you really want to know more, you need to read the book “How to Study in College” by Walter Pauk, the Cornell professor who first came up with the method. Fast forward a large number of years and we now have OneNote and the Tablet PC, and OneDrive which links our phones, PCs and OneNote all together. This, in my opinion, allows a complete redefinition of note taking.  One of the advantages of working digitally on a Tablet PC is the ability to mash up photographs, videos and published documents (high fidelity content) with inking and highlighting (low fidelity content). Travis Smith, from Microsoft Education Australia, makes a great case for this in his presentation “The Pen is Mightier than the Keyboard”, making his whole presentation from within OneNote, using pan and zoom to navigate the mind mapped content, co-creating parts of it with his audience, using digital ink. It was during one of these presentations that I had a personal epiphany in which I asked myself the question – What if we took notes in this way. I tried this the next day at a lecture I attended and have done so again at every learning activity I have attended since. I’ve probably repeated the process over 20 times, and it doesn’t matter if it’s a meeting, a lecture or a lesson, this works – especially when coupled with a modified version of the Cornell Note taking method. I have found, I really am now making notes, not just taking them in my old linear way. It works like this. At the start of the session, I create a new OneNote page on which to make my notes. I like “graph paper” rule lines, as it helps me navigate the page and write more neatly. I then zoom to the maximum extent, using the pinch gesture. This gives a reasonable amount of space, but not enough – so I draw in the bottom right corner, and then OneNote allows me to zoom out again using the pinch gesture. Repeating this twice again, I end up with a really large canvas – then delete all the previous corner marks leaving the last. Now I have a H U G E canvas to write on! In the centre of the canvas, I write the central idea/topic and the presenter(s) names. This then becomes the reference point to start taking notes and making my mind or spider map. The trick now is to use zoom (with the expanding pinch gesture) to zoom into the canvas to take notes in areas around the page, taking them sequentially and linking the ideas/notes with arrows. As a rule, I try to think of myself as a satellite – when zoomed out, I see the structure of my thinking, the big ideas and linkages – so I zoom out to make the headings and associations. Once I zoom in, I want to see detail – so it is here that I put the examples, traditional “notes” and my specific thoughts on an idea, process or concept. The ability to zoom in and out really changes the note making (and reviewing) experience in a way that is not possible on paper. The real time saver is to start inserting digital content by whipping out your mobile phone, taking a photo of the presenters screen which saves automatically to OneDrive, and then inserting this into the page in OneNote directly from OneDrive (insert>>picture>>OneDrive>>Camera Roll). Of course you can also take a photo with your Tablet PC, and insert it from the local camera roll. In a webinar or online presentation, the screen clipping tool works perfectly for this (and you can even just insert just the bit you want or need!). You are now able to annotate over and around this digital content, making your meaning, rather than simply note taking. The use of highlighters to create attention, and coloured pens to classify content also assists in creating a full set of notes that are easy to navigate. I still keep a “Cue” column down the left (or sometimes right) for questions, key points and ideas; and instead of the summary being at the bottom, I make it at the top right, where I would have once traditionally started taking my notes. That way, when I come to review my notes, the opening point is the “start” of the page, which is where the title block and summary is. Then it’s just a matter of using zoom and pan to renavigate my notes – zooming out to see the big picture thinking and associations, and back in to see detail. It been a definite process for me to learn to take and make notes this way, but I know it is making a difference to my understanding – I won’t be going back! How the notes look zoomed out (you can see the big ideas and links):
  And zoomed in (for specific content and notes)

[…] to the clear plan. The plan also uses the zoom and pan note taking method that I wrote about in my November 11 blog, allowing the satellite view of the whole series, but zooming into the detail of each […]
LikeLike
Hi Matthew;
I find your blog and videos extremely useful.. Tqvm for sharing. I’m having problem downloading the Cornell notes template. When I click on the hyperlink above, I get a page with Greek letter !
>>> and even download a OneNote template from http://office.microsoft.com/en-au/templates/cornell-note-taking-method-TC010080377.aspx
LikeLike