
A friend of mine is at the start of her journey making recordings for educational instruction, and in conversations with her I realised that when we first start, there are a lot of questions we need answered. It can be quite daunting, yet like most things, once you start you only get better and better. So here are my ten quick tips for getting started, making it easy and trying to get the best possible outcome.
1. Practice
Before you even start recording play with your equipment. Get on Skype and talk to your Mum, or Dad or whoever else. How do they find the audio? How do they find the video? Do you need to consider your environment or timing?
I often make my recording late at night or early in the morning – this is when my kids are in bed, and neighbourhood noise is reduced. I also used to get ridiculously nervous speaking on microphone or camera and would literally freeze up – I practiced using Skype and FaceTime with my family and kids, and then started recording my classes with a camera at the back of the room. Once I realised I was fully in control of the recordings and who saw them, my nervousness all but disappeared.
2. Work out who, what and when?
Before you even start, you need to work out why you are making the recording. Who is it for? What is the message? When will it be heard? Does it need audio only or visuals as well? Will it be used once or many times? It is only with a clear understanding of the purpose of your recording that you can actually go ahead and make it.
3. Plan it well.
You wouldn’t (I hope!) walk into a classroom or onto stage without a plan – the same goes for recording. Think about the sequence of what you are presenting. I personally put the same amount of work into my recording as I do for a lesson plan – I have a key theme, key points, and make resources that I will use. I always have a “cheat sheet” (out of view of the camera when doing video too) that I can refer to for specific terminology I may blank on.
4. Keep it short
Plan to be between one and ten minutes. Preferably five or so. If it’s longer than this, you better be really engaging and have a really good reason!
Make sure you can see a clock – it’s easy to go overtime – and overtime is overkill.
5. Think about quality
The better the audio quality, the easier and longer people will listen. Use the best microphone you have access to and can afford – you can see my video on microphone quality here:
https://www.youtube.com/watch?v=tApAskptM7U
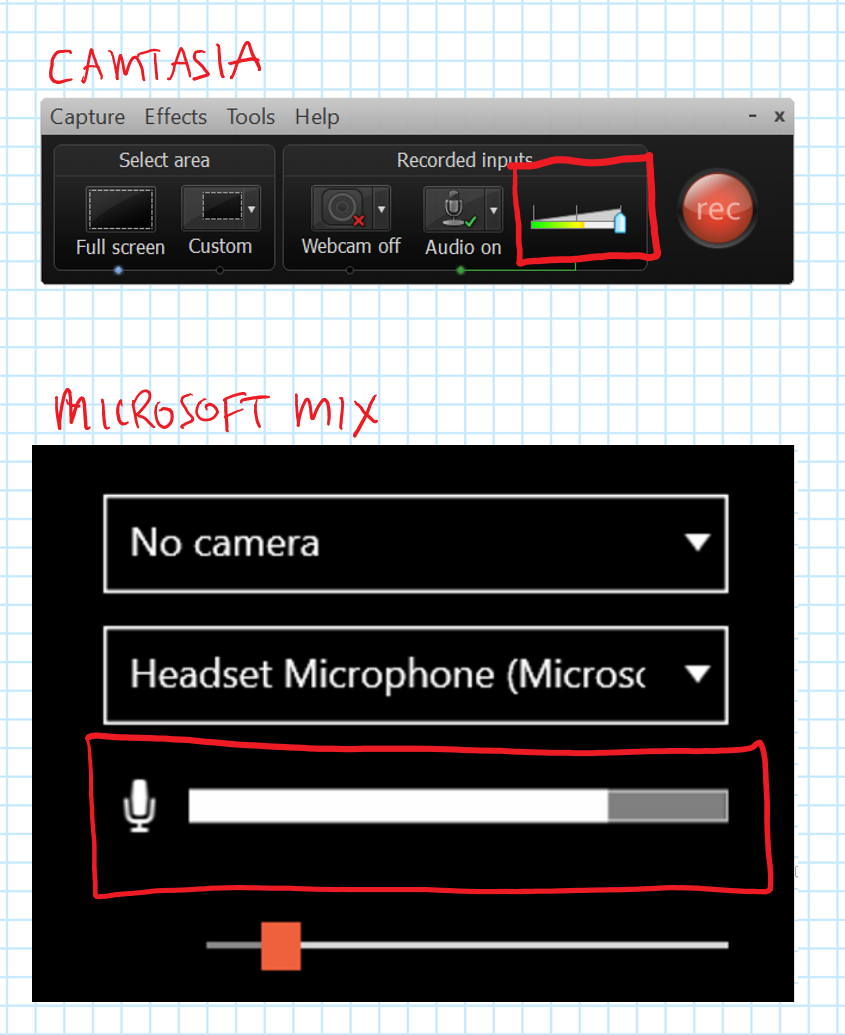
Make sure you set your microphone up correctly. It should be about 100mm from your mouth, although if you want the microphone out of camera shot it can be up to 500mm away. Adjust the volume input so that it’s hovering around 75% – you want it in the green with peaks into the orange.
Think about your body – don’t bang the microphone or the desk that it’s sitting on. If you are going to screencast and annotate your screen, is the microphone going to pick up your stylus movements?
Think about shutting the door! Let people know you are recording so you don’t get interrupted!
Do a quick test
Before you record that masterpiece, do a quick test and play it back. Make sure you have the correct microphone selected as the source – I sometime muck this up and record using the internal microphone – doh!
Leave some space
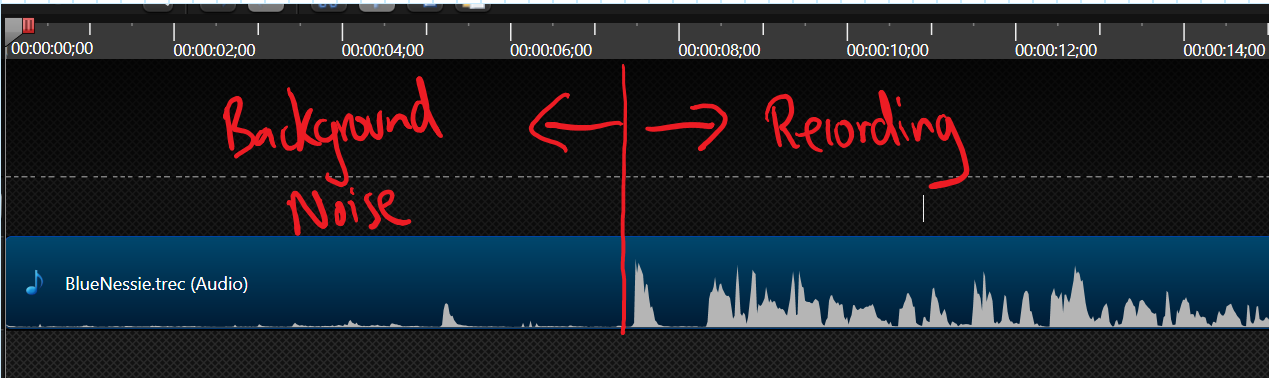
Once you actually hit record on what is going to be your real recording, wait five to ten seconds before you speak. This gives you time to compose yourself, and also gives you a background noise recording – in most software you can use this to do noise reduction in editing.
Here is what the space and background noise looks like:
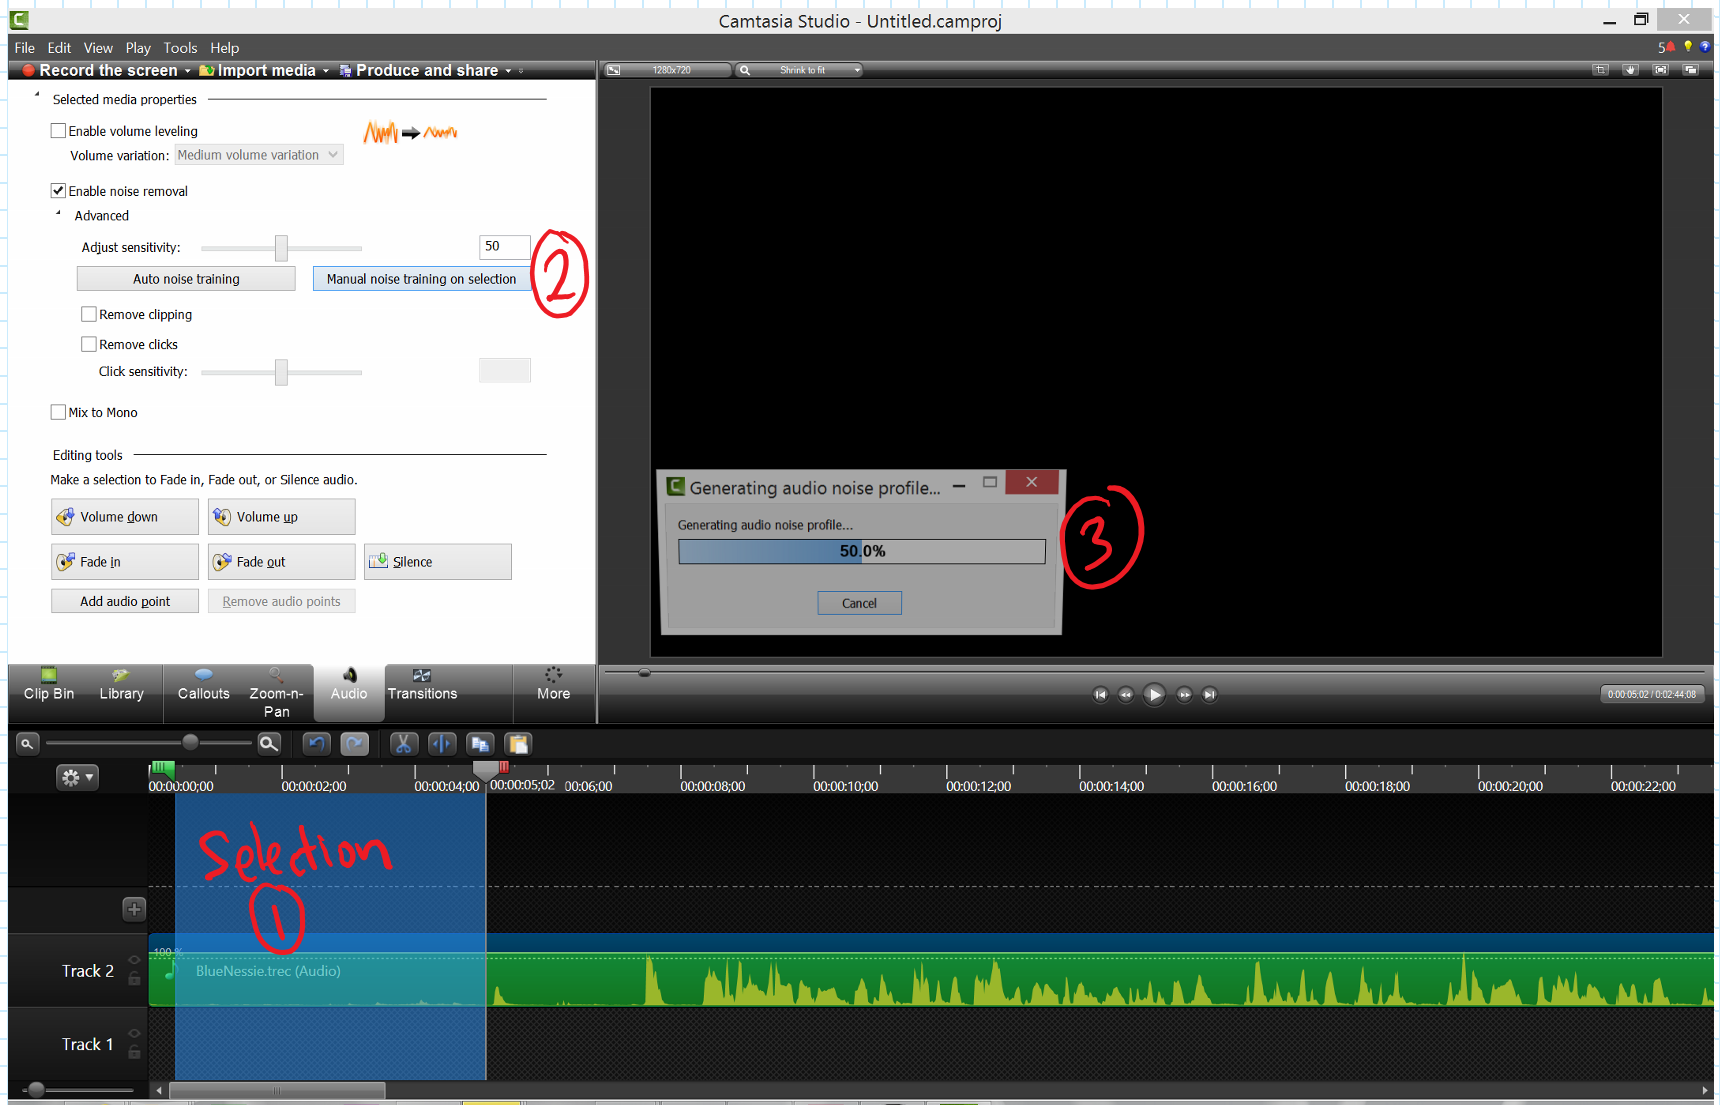
And here is the background noise being removed in Camtasia:
Enunciate. Project. And smile!
Make sure you speak clearly, not too fast and not too slow. Keep your chin up to help you project and remember to smile – even if there is no video, this changes your face and comes through in the recording.
You will stuff up!
So don’t stress about it. Just stop. Give yourself a ten second pause, then start the sentence again. There is no such thing as a mistake when recording – only editable moments. Leaving the long gap gives you time to think, go back and get ready – it also shows up in any editing program, so you can clip out the mistake – no-one will know!
Here is an example – deleting the mistake is easy!

Save your work – then edit and export
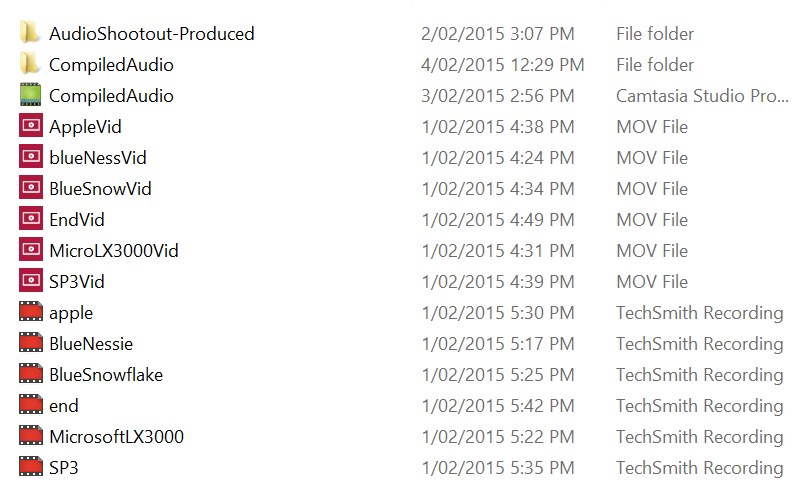
Once you are done, save it straight away with a file name that tells you what it is you have recorded (and the take if necessary). If you are diligent about this, editing it will be easy as you can find what you need. I make a folder for each recording, so all resources sit in the same place – keeps thing neat and tidy.
This is an example of the folder for the Audio Shootout video (linked above) – you can see the video files, the audio recording files and the naming makes it easy to match everything up:
Then it’s time to edit and export – take out the editable moments, maybe fade it in and out then export to the file type your audience will use – most likely MP3 for audio and MP4 for audio and video.
A final word
After your preparation and set up, making and editing the recording shouldn’t take more than three times (3x) the final production length. Once the length to record it. Twice the length to edit it, and then export it to distribute while you get a hot or cold beverage of your choice.
Your first recording will probably take longer – but you’ll get the hang of it. My simple recording now take 1.5x the length, whilst my complex recordings are 3x. My first recording was five minutes long and took a whole day – so I’ve come a long way.
Most of all have fun – and just keep on doing it!

[…] I wrote about starting to record audio for educational instruction, giving my ten top tips. If you haven’t read that, you need to […]
LikeLike